My Paper Pumpkin kit arrived yesterday, and I wanted to show you the cards that I made with the kit. First, the kit came in a brown box instead of a pretty red one. Stampin’ Up! has assured us that the kits from now on will come in a red box. I guess some kits had been pre-packaged in the brown boxes. The kit contained an acrylic block, a Basic Gray Stampin’ Spot, stickers, card bases, envelopes, Designer Series Paper, two stamps and four buttons, along with the instructions to make four cards. This is the card I made following the printed instructions.

Instead of making all four cards exactly alike, I thought I would change it up a bit. This next card I made in basically the same way, but I flipped it on its side.
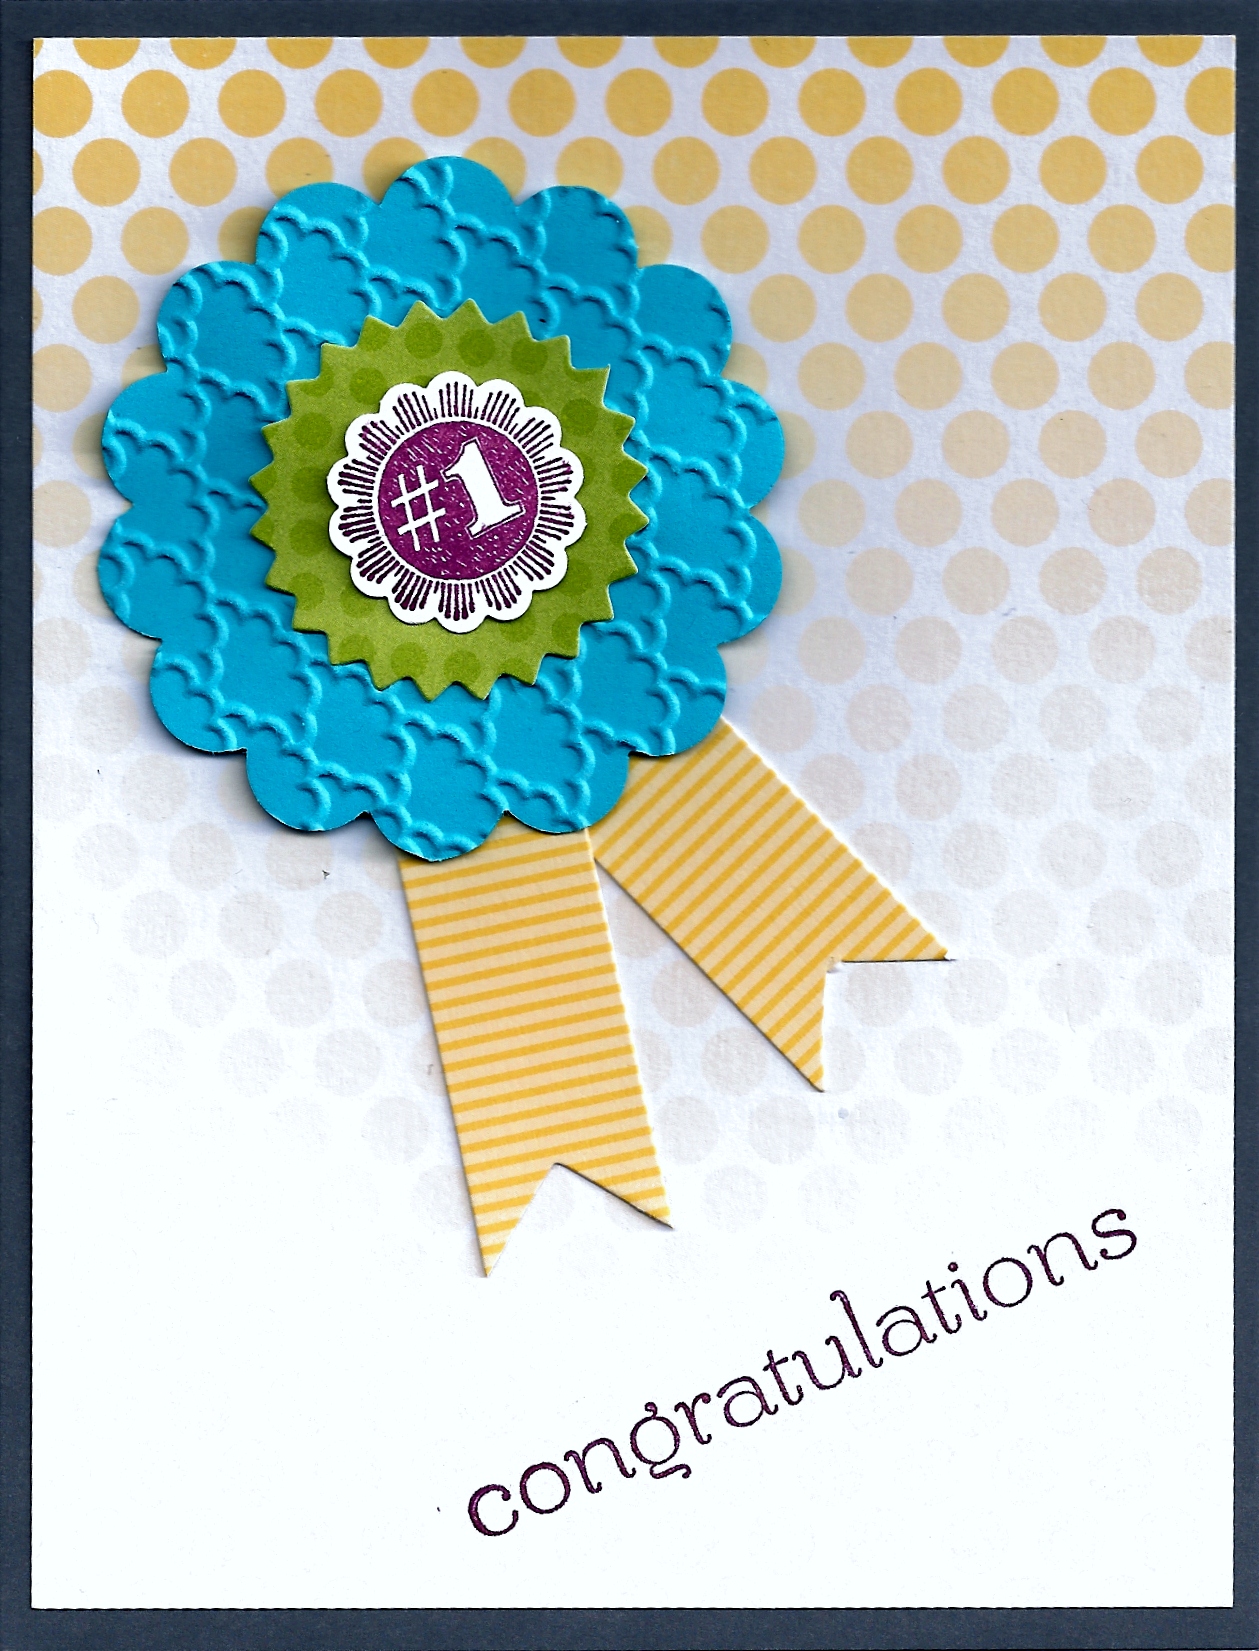
Let’s step this up a bit with this next card. I placed the Designer Series Paper on the Basic Gray card base. I took the Daffodil Delight sticker and cut it in half. I then notched the one piece to match the pre-cut one and placed them on the card to make my ribbon. I then took the 2-3/8″ Scallop Circle Punch and punched some Tempting Turquoise card stock. I ran this punched piece through the Fancy Fan Embossing Folder using the Big Shot. I layered my scallop sticker on the punched piece. I then took my Ciao, Baby stamp set and stamped the #1 in Rich Razzleberry on Whisper White card stock and punched it out using the new 7/8″ Scallop Circle Punch. I placed this on my other piece using a Dimensional, and the entire piece was added to the card as shown using Dimensionals. I stamped “congratulations” from the Sweet Elements stamp set in Rich Razzleberry.
My final card used the two leftover scallop borders from the set, placing them along one side of the Designer Series Paper. I stamped randomly across my paper using the blotchy stamp from the kit, having inked it with the Basic Gray Stampin’ Spot. I next took the Bitty Butterfly Punch and punched my butterflies from the final Daffodil Delight sticker strip. I popped them on my card, along with the final scallop circle sticker. Of course, I just had to add a little bling – Rhinestone Jewels on the butterflies.

You know how sometimes what seems like a good idea in your mind doesn’t quite turn out that way when you put it to paper? Well, that’s how I feel about this card. The more I look at it, my stamped spots seem to look like butterfly poop! Anyway, I used all the kit elements except for two buttons. All in all, Paper Pumpkin is perfect for a new stamper or for someone who wants to create something special without the fuss of all of the various crafting tools. Keep Thinkin’ Inkin’!