I can’t believe I agreed to this challenge with my sis-in-law, Susanne. What was I thinking???? For one thing, I am both a scrapbooker and a card maker, but I’m much more comfortable making cards than creating my own scrapbook layouts. This is the reason I take classes with pre-made kits I only need to put together, instructions and all of the ephemera and embellishments provided, or cheat and just copy my sis’s-in-law 12×12 page layouts. But since she is much more comfortable with scrapbook layouts than cards, it only seemed fair this month’s challenge should lend more to her strengths, not mine. Fair, shmair!! I’m lousy at this.
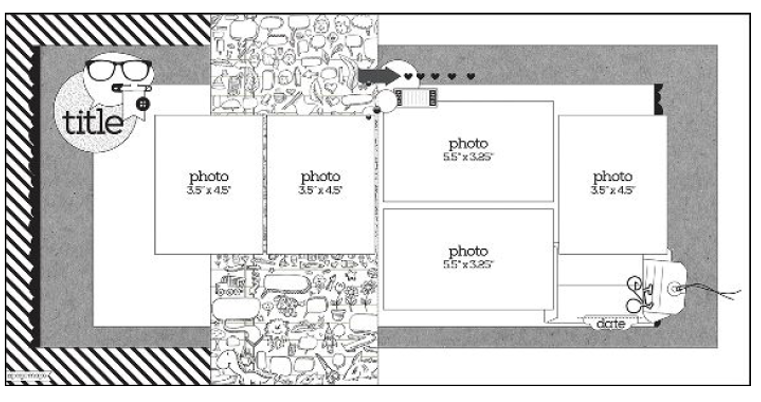
Anyway, I chose two 12×12 double-page layout sketches and she chose two. Mine is the one above and we’ll switch off over the next few weeks. I can’t blame anyone but myself for this quandary, since I’m the one who chose this sketch. Hold off looking at her creation before seeing mine so I have at least a tiny bit of a chance to not look so simplistic.
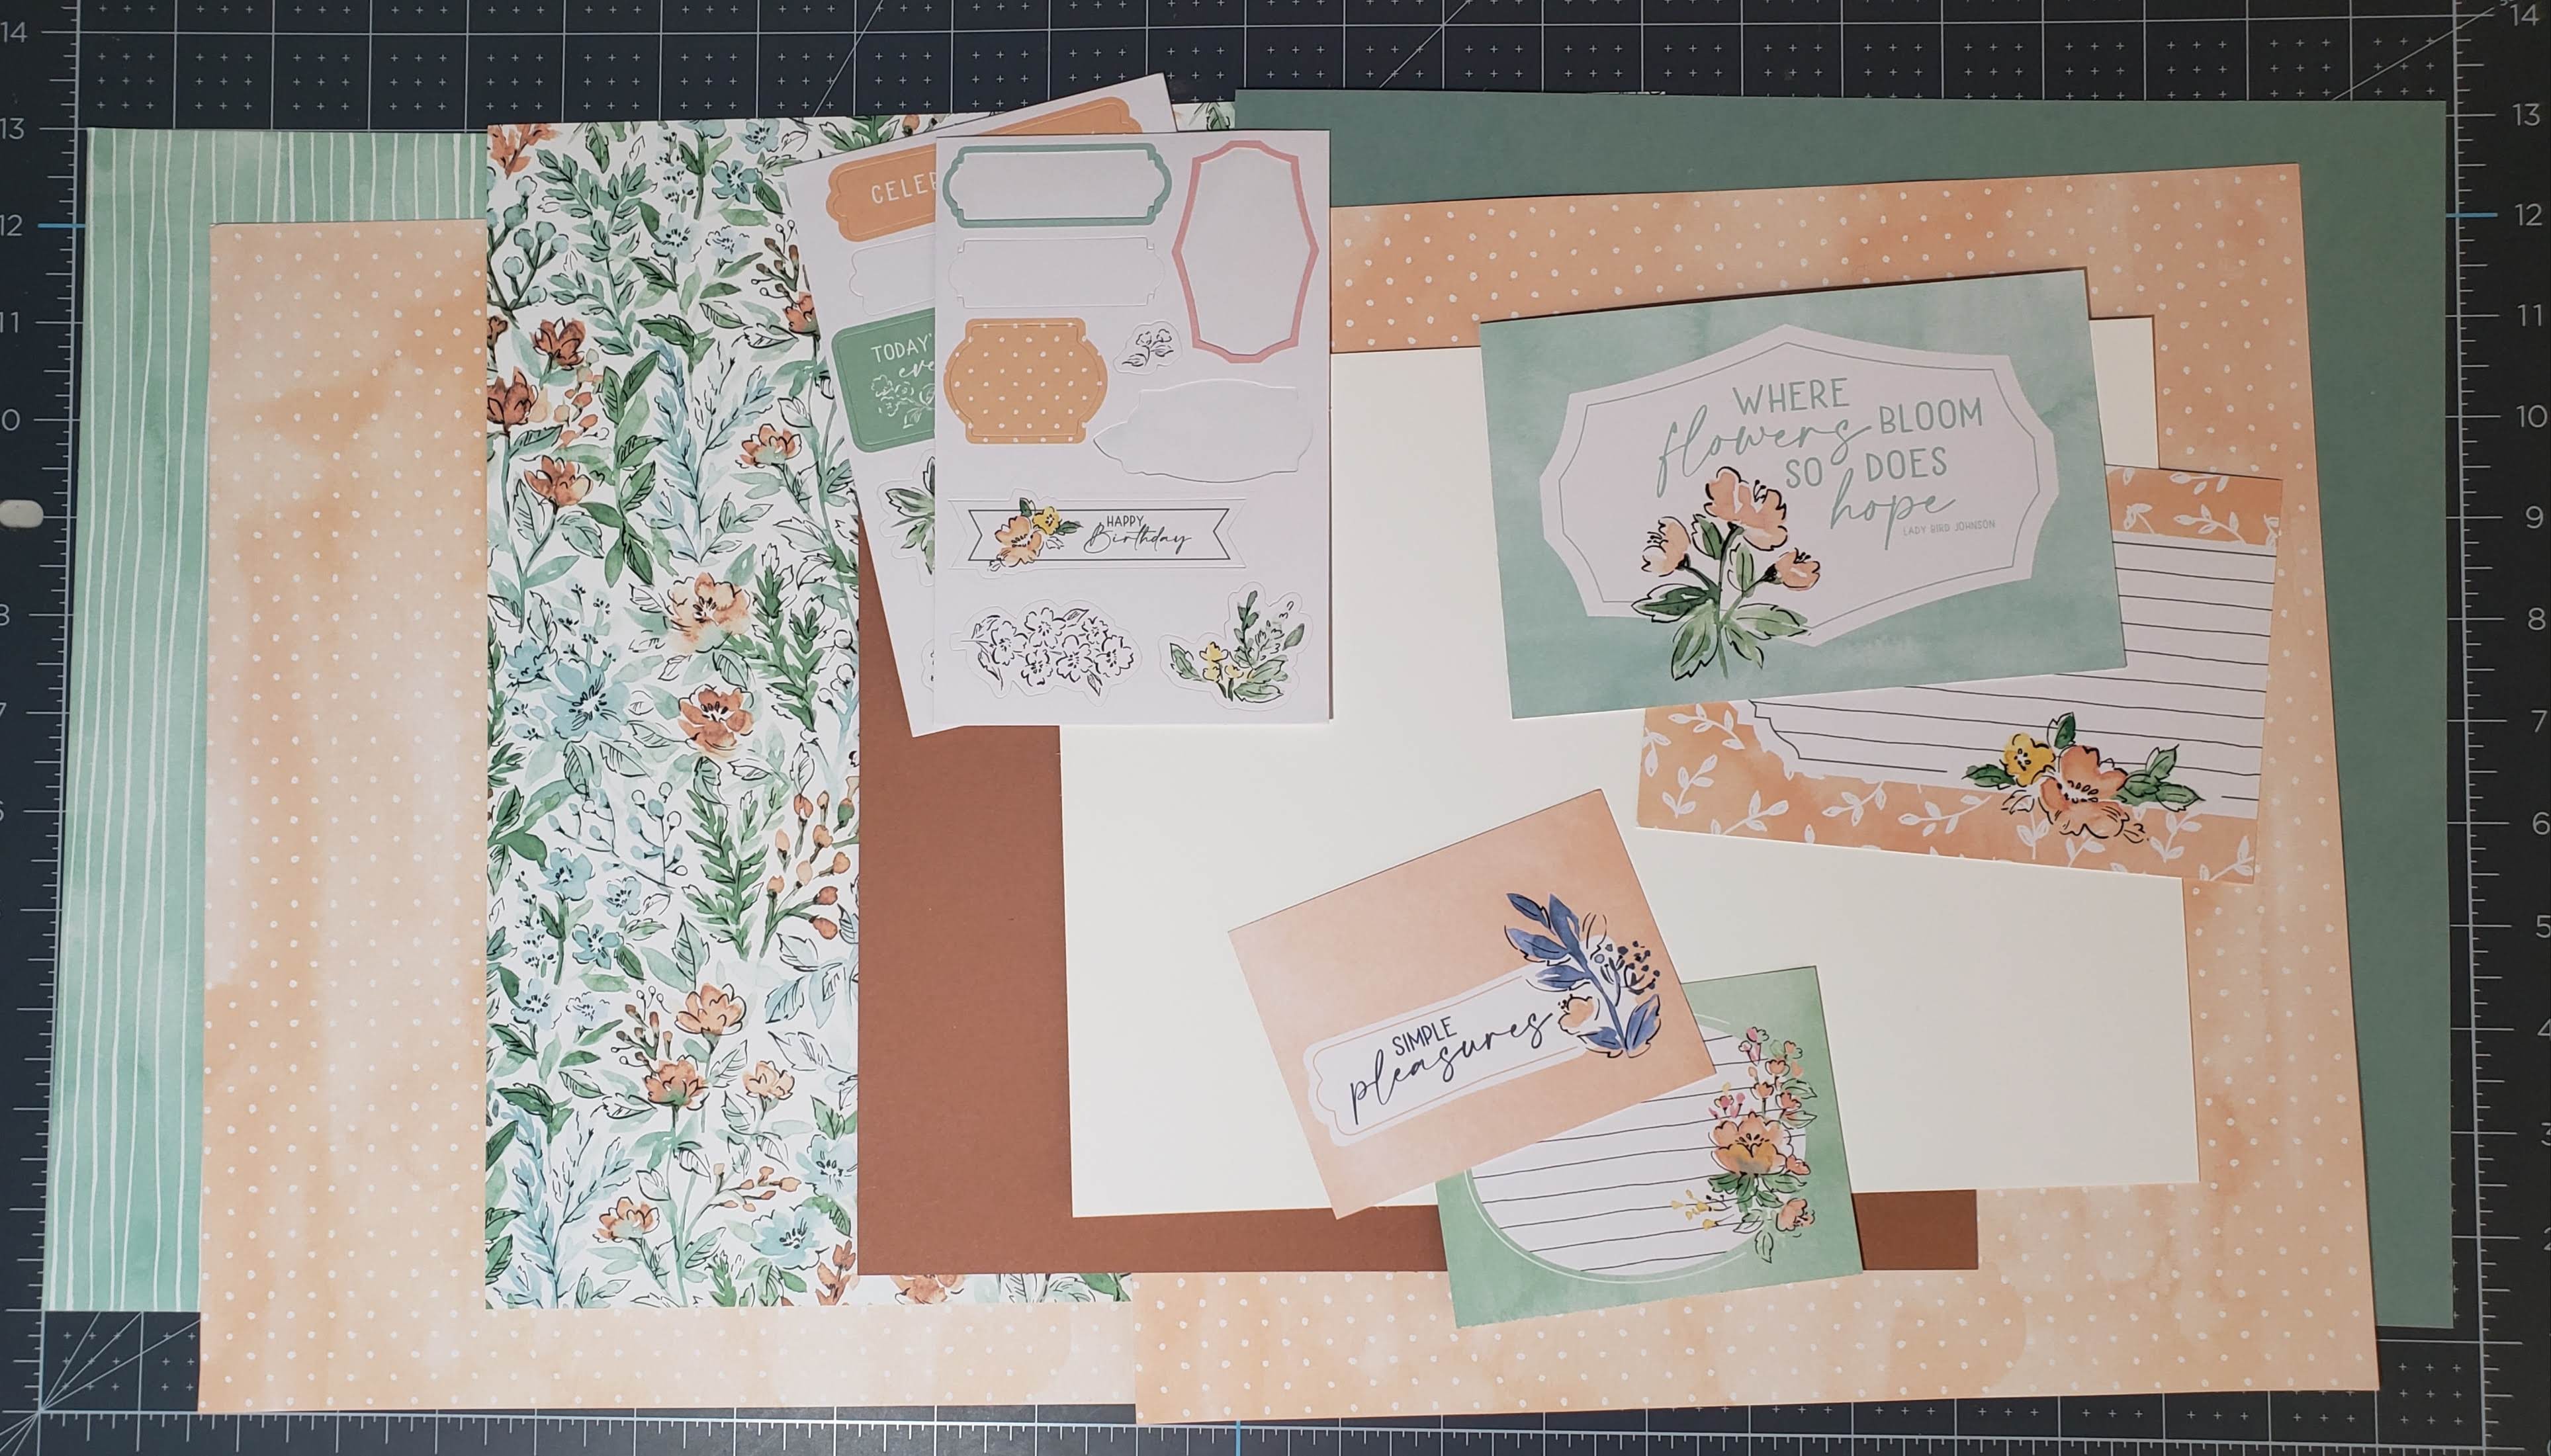
This was my starting look at what I thought I might use for the basics. I chose the Hand-Penned Designer Series Paper. I knew everything coordinated and then I could add cardstock as needed and I also had the Memories & More Card Pack to work into my layout. I didn’t even attempt to think about embellishments yet.
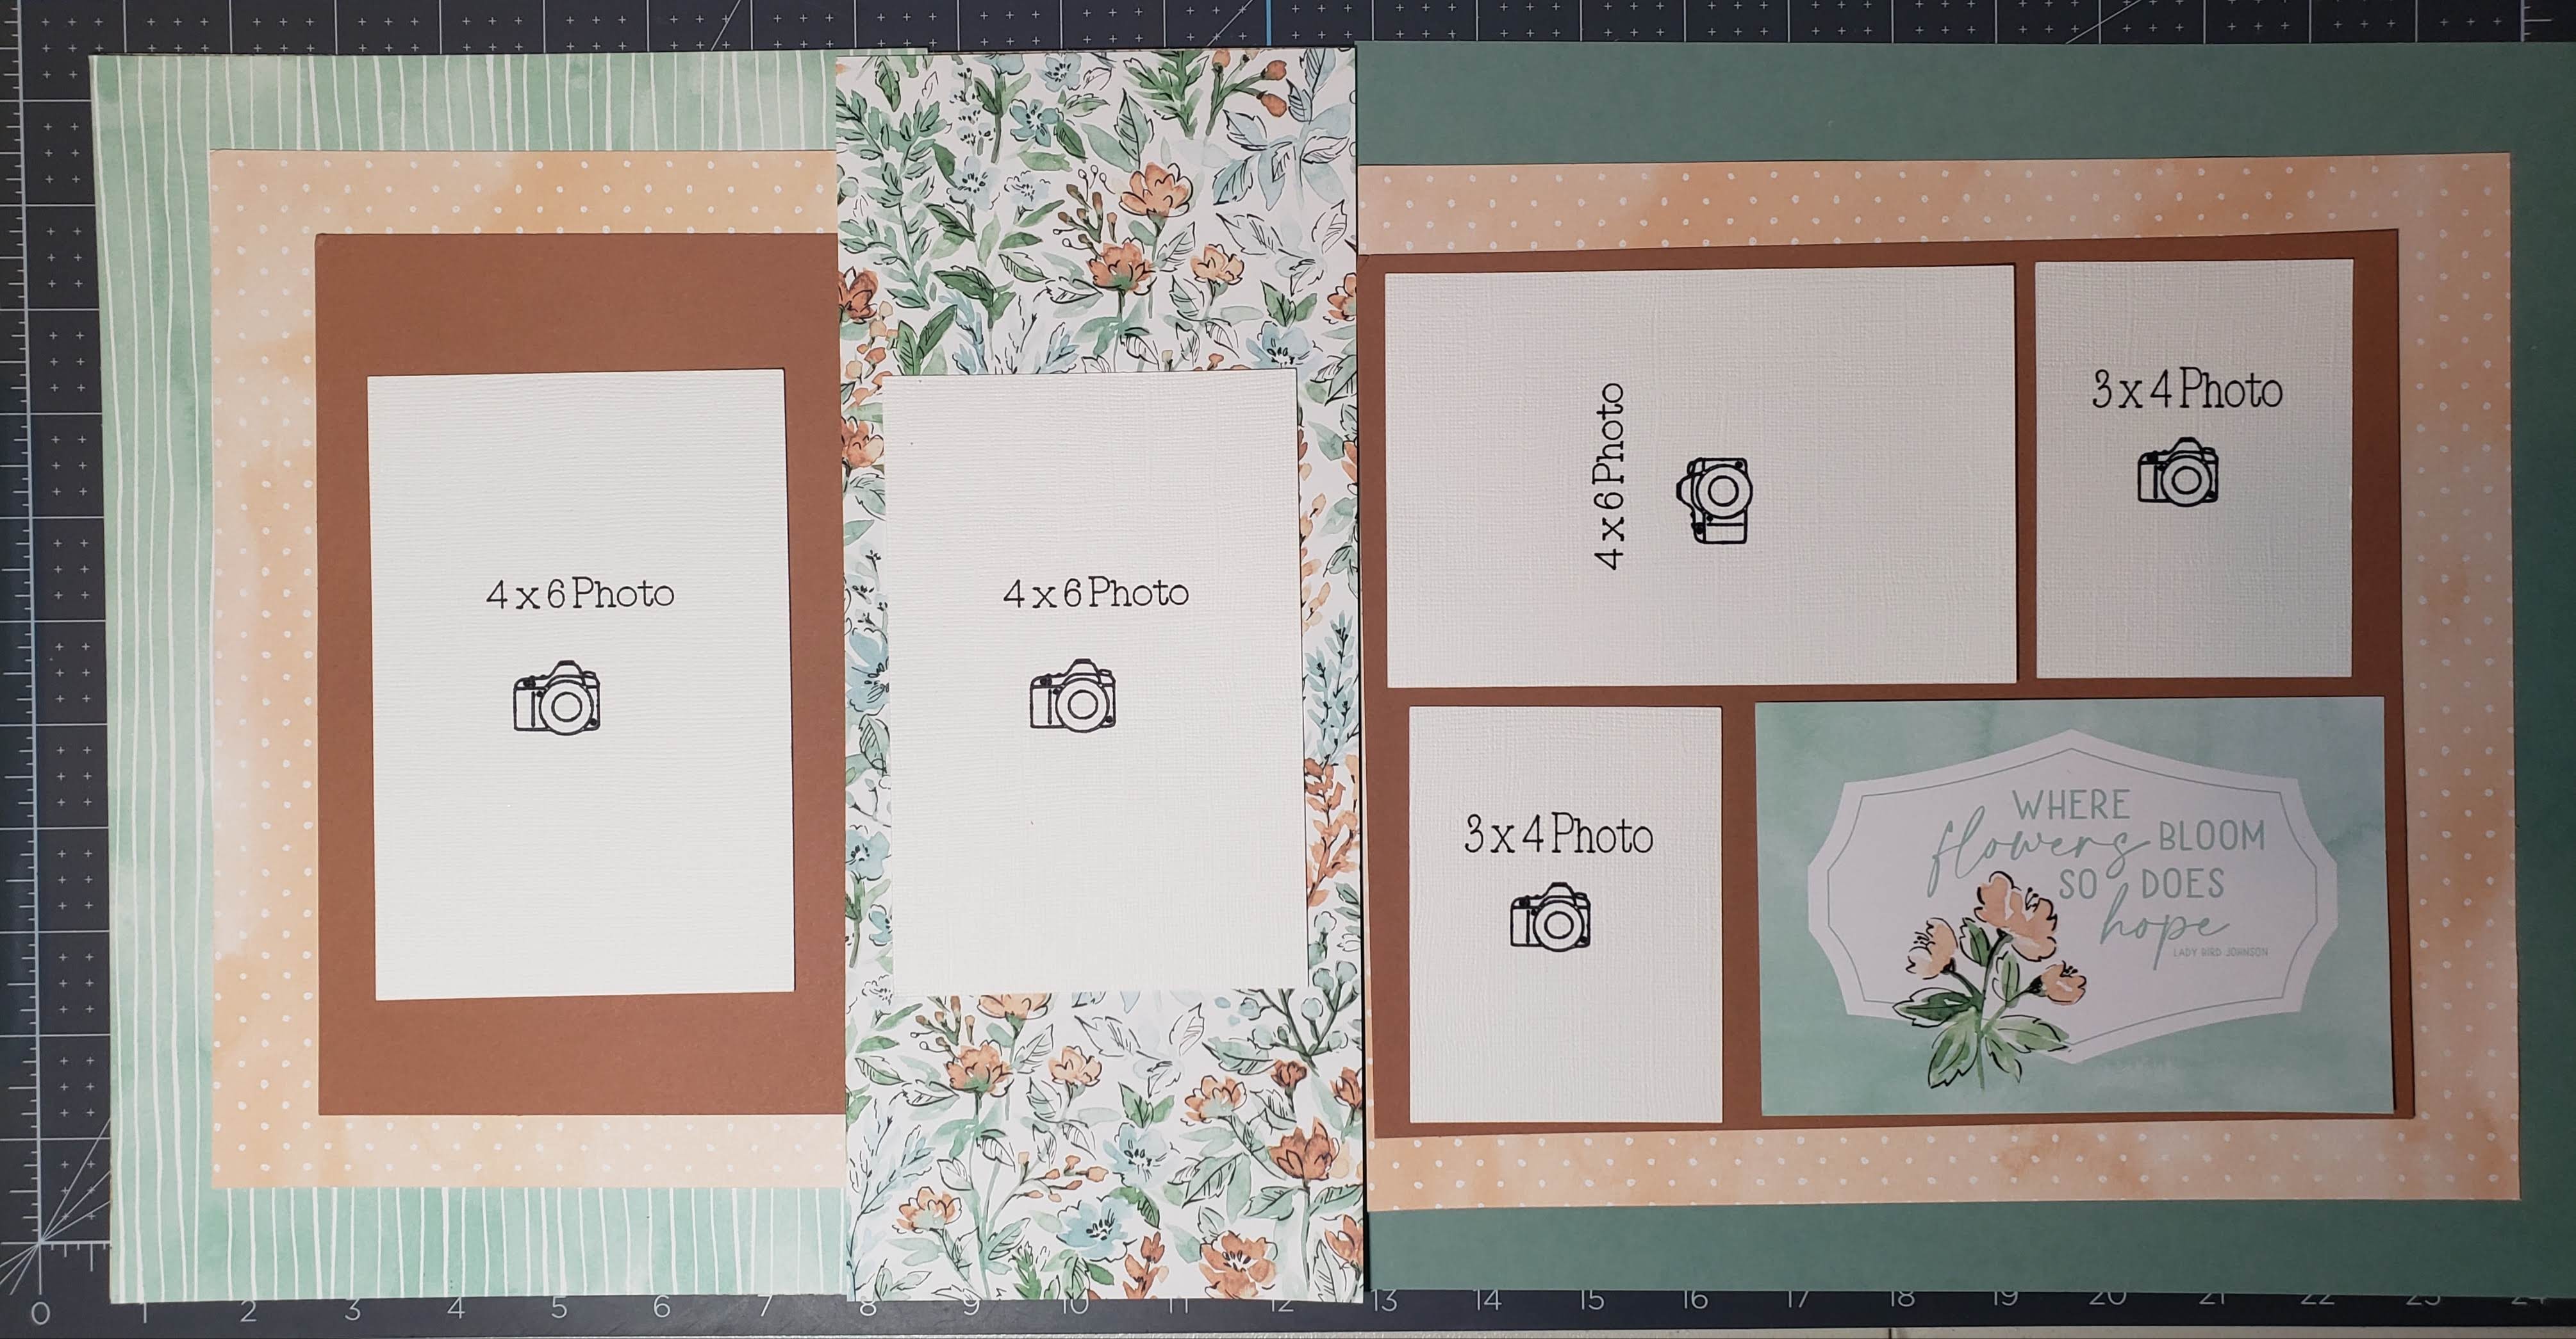
Since the sketch I chose had some weird measurements on the photos, I thought I would show you how you could use my same basic layout with more of the usual sized printed photos.
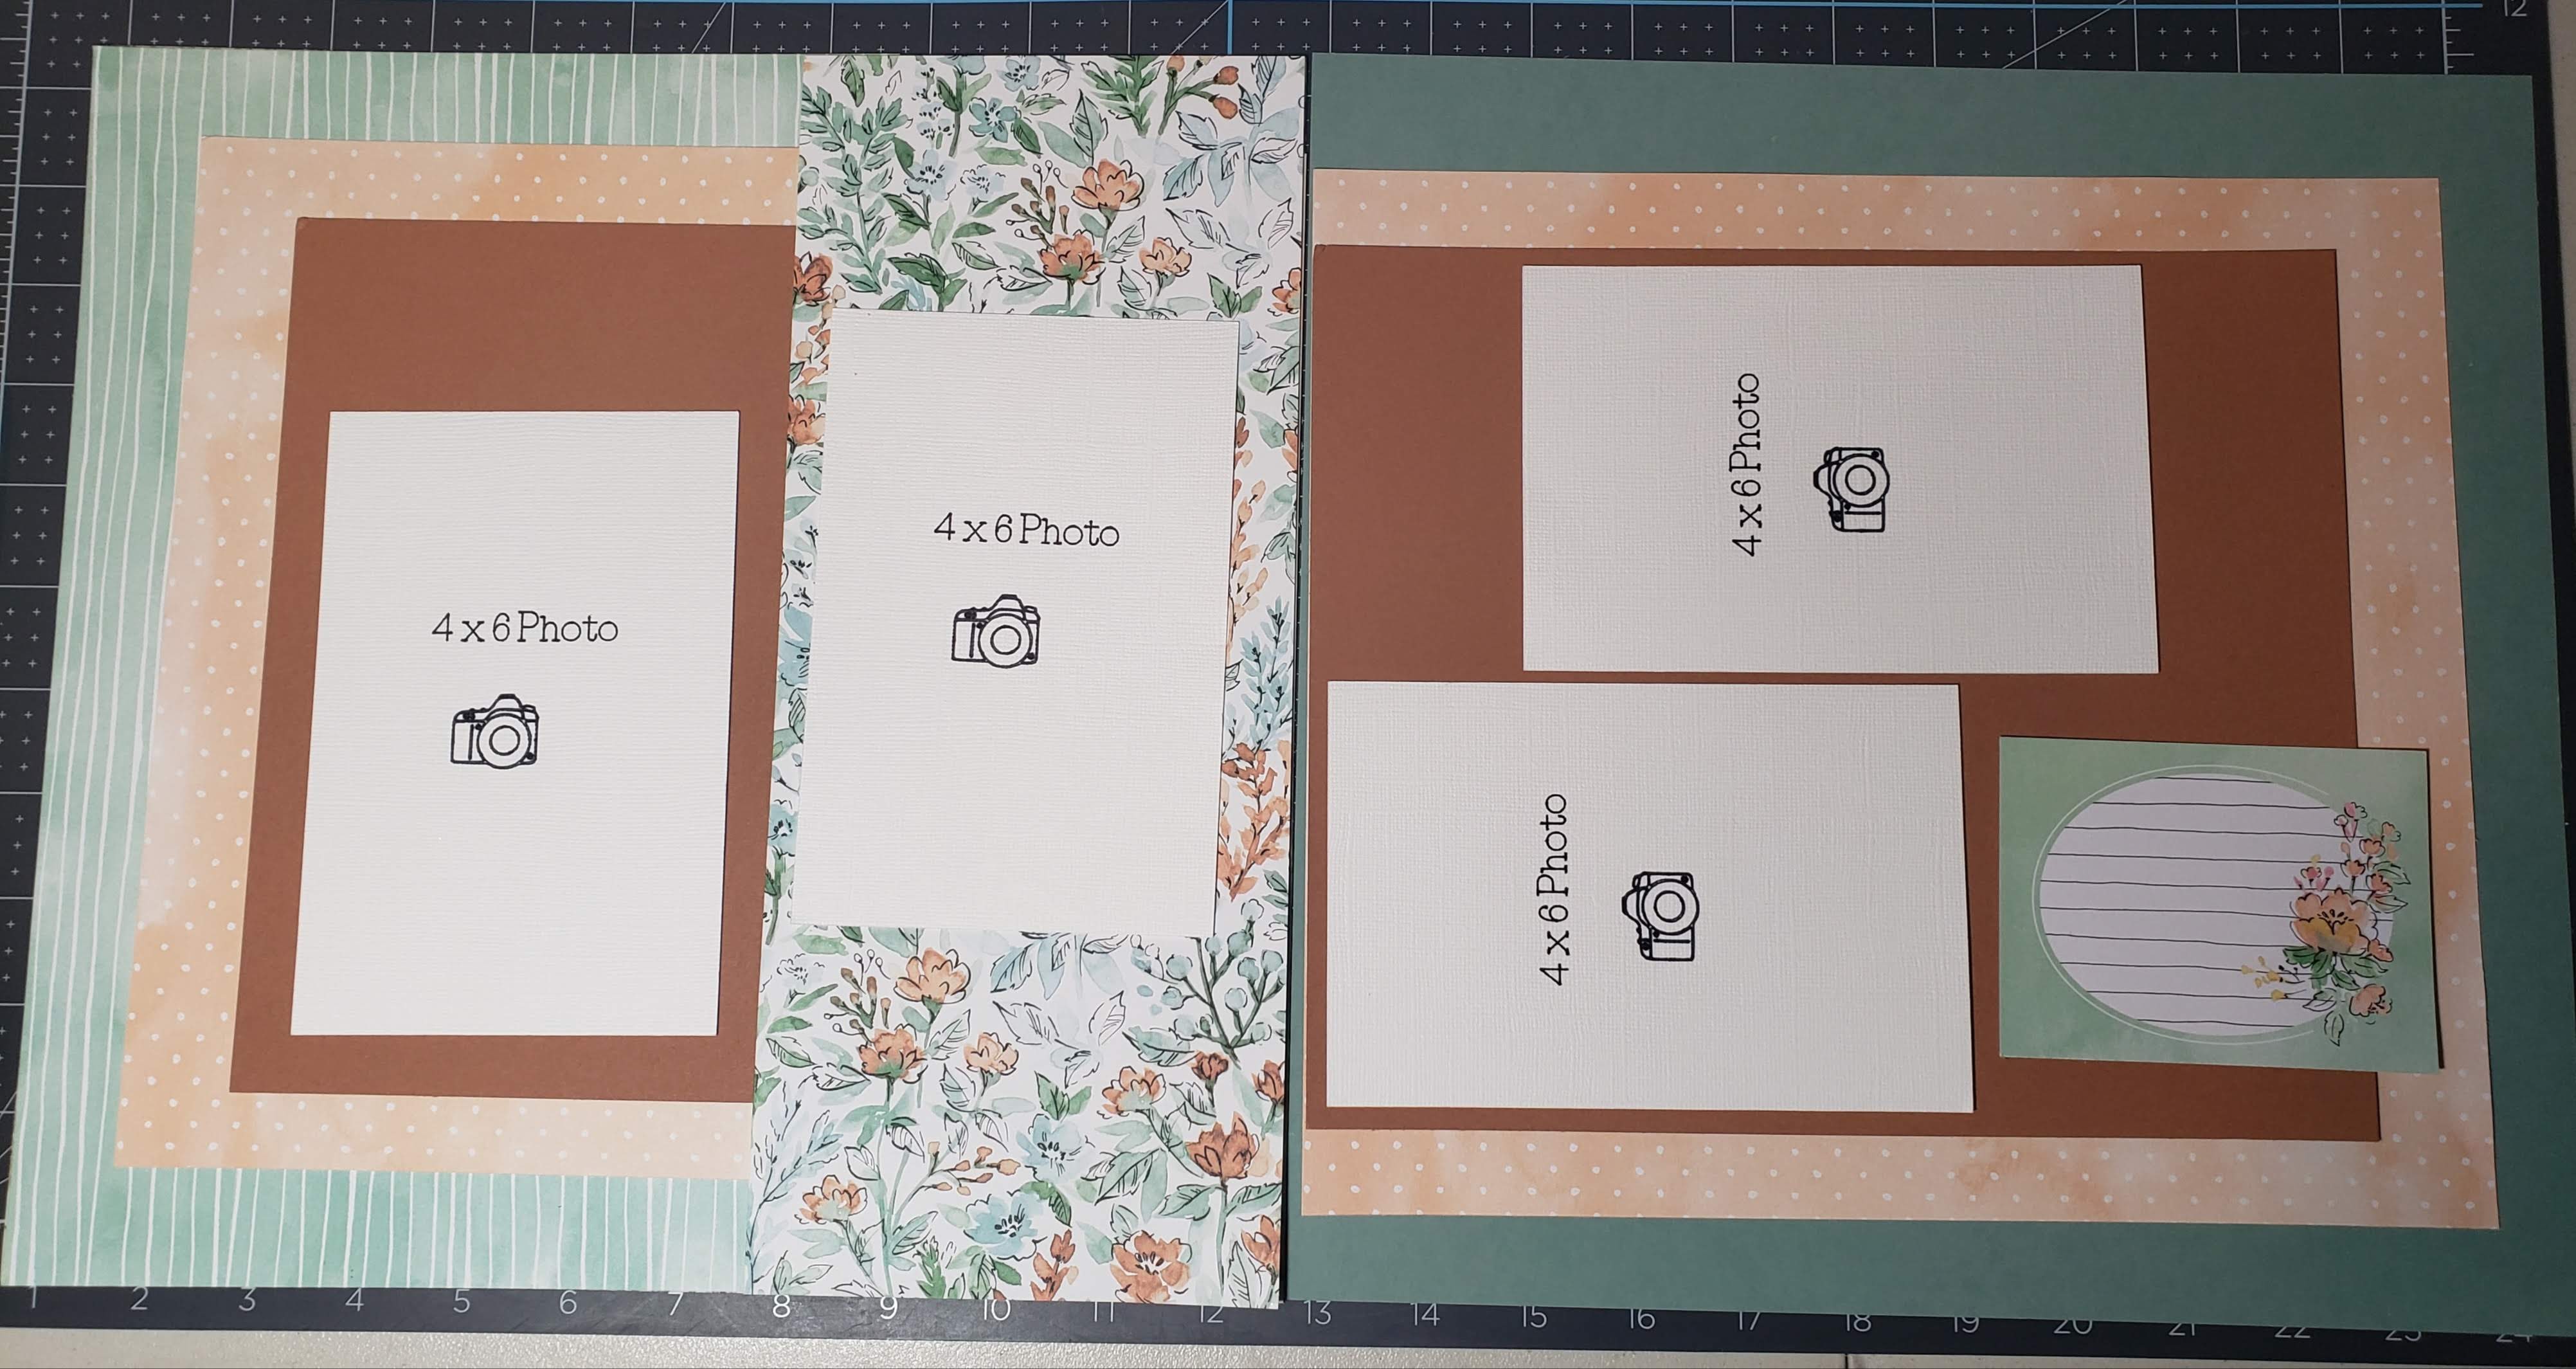
And here is one more using all 4×6 photos.
Now for the grand finale and my finished pages.
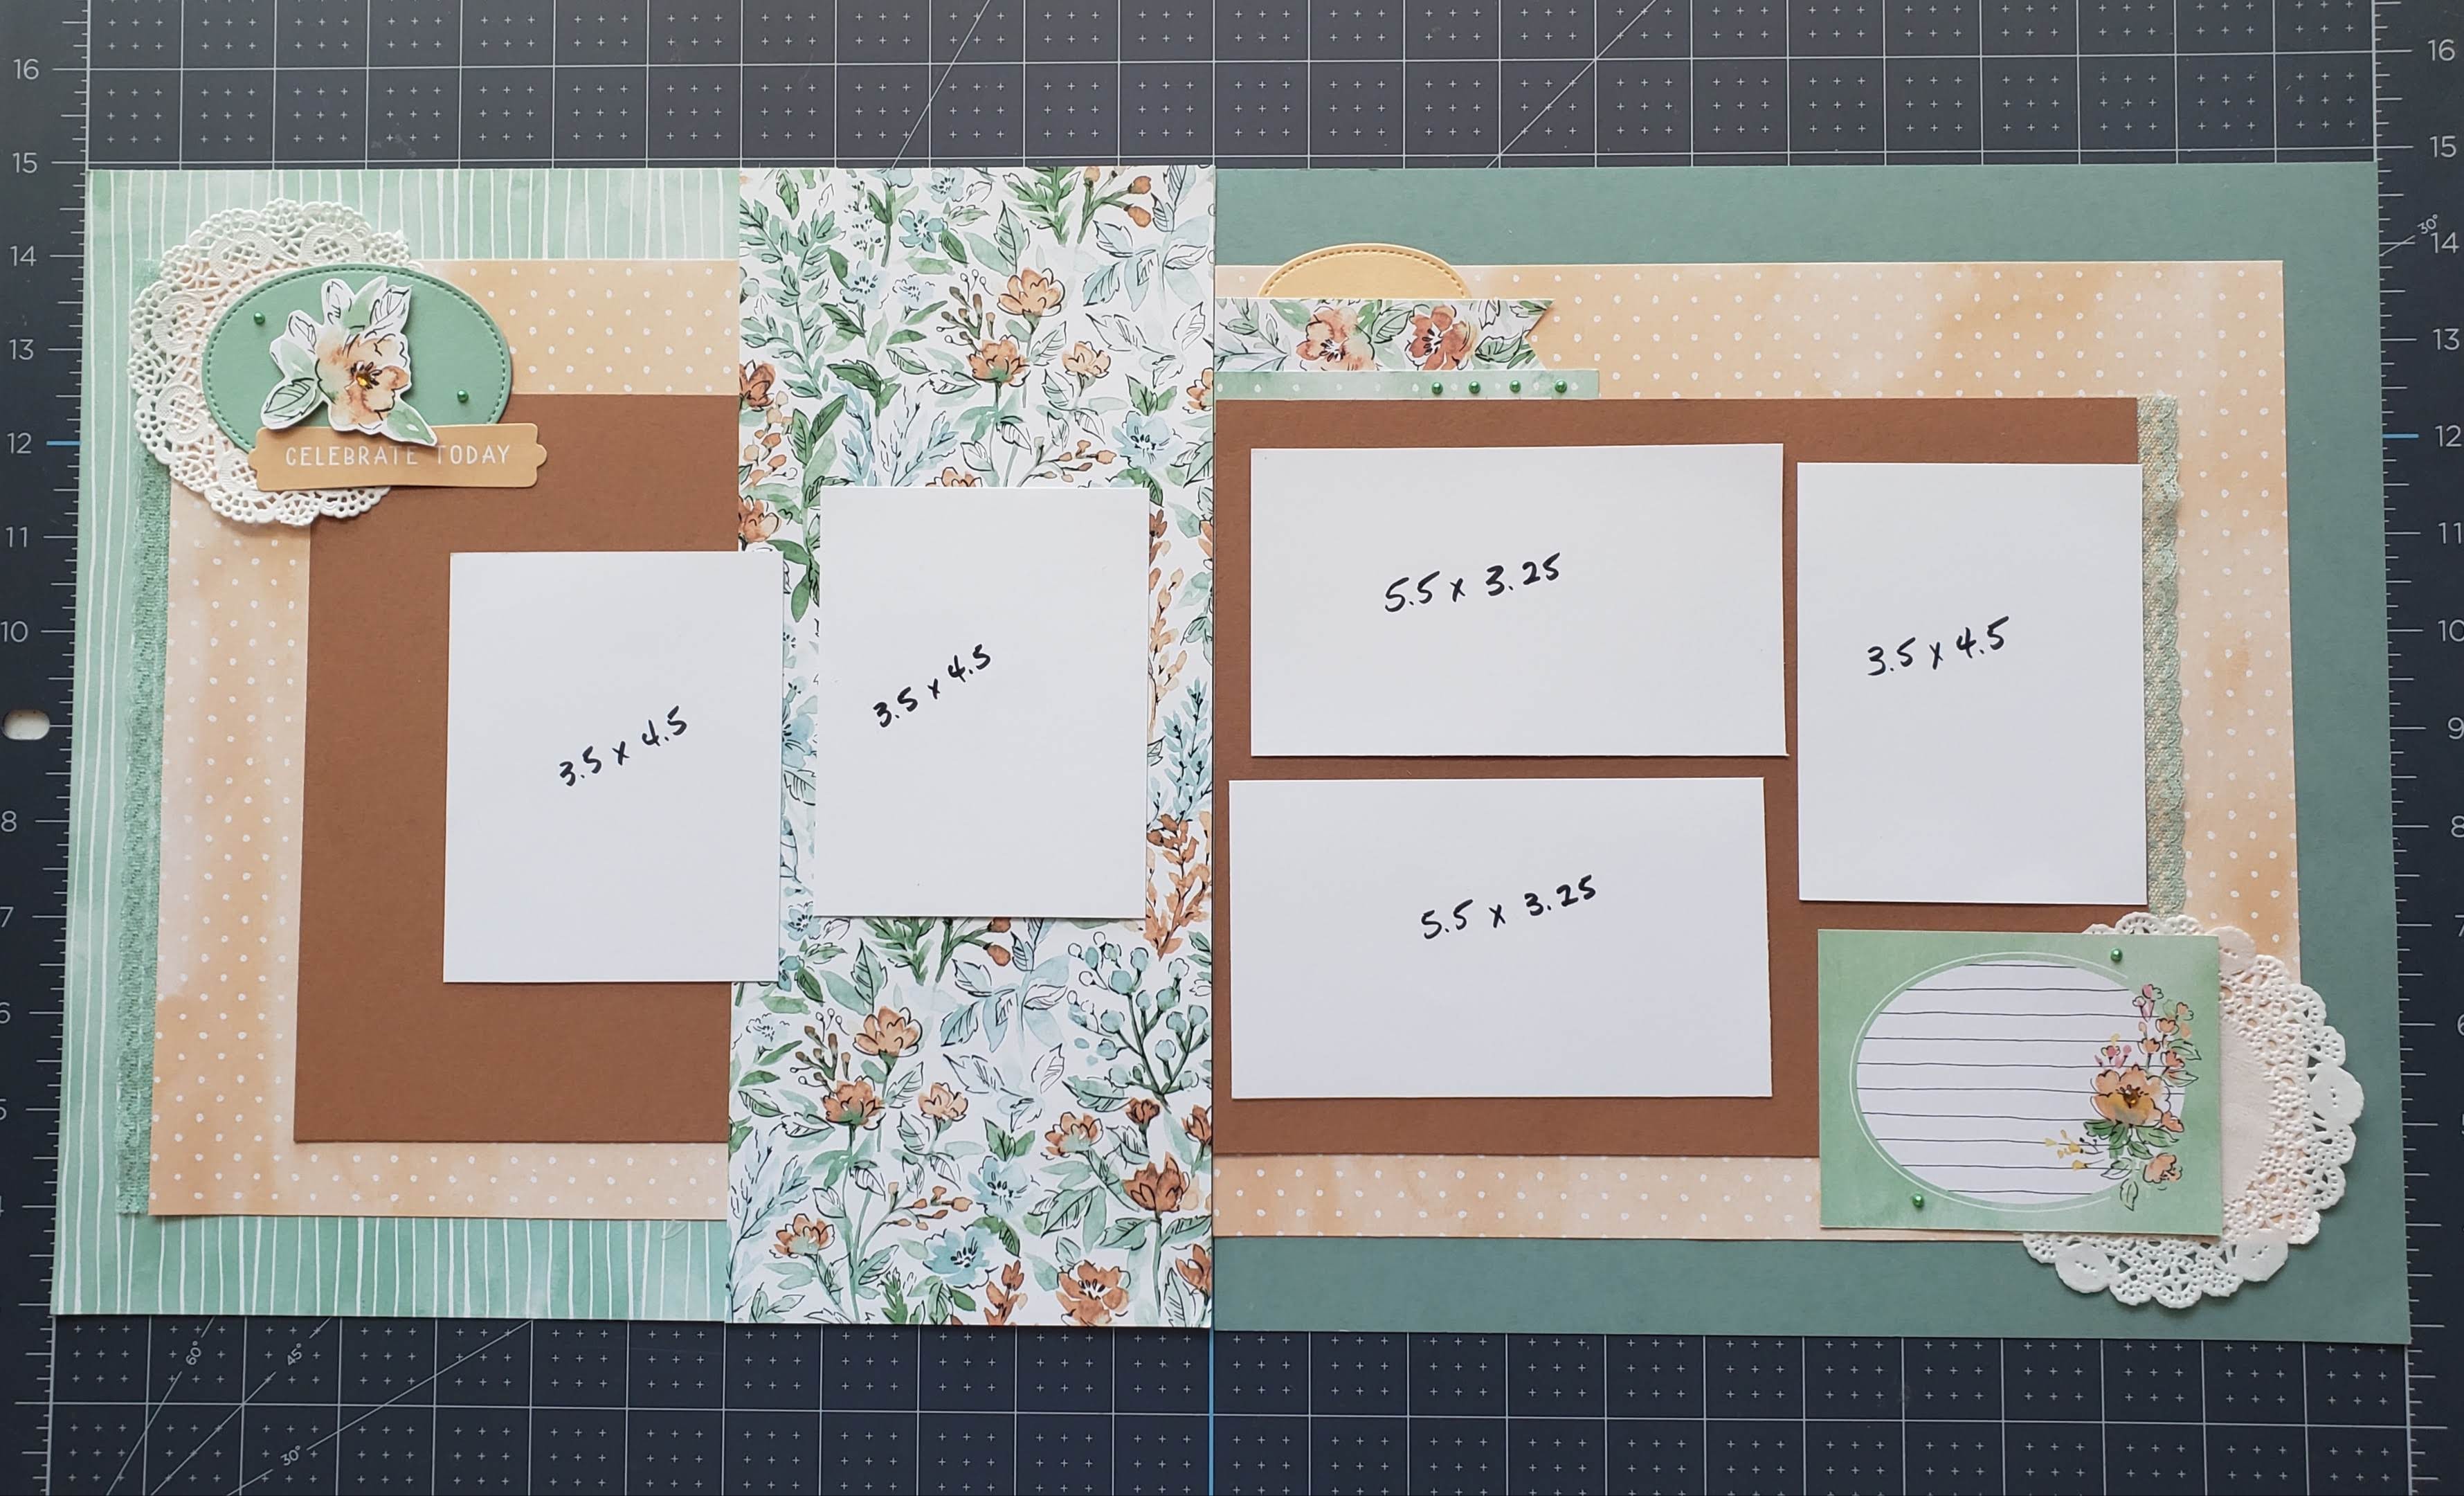
I started off with one 12×12 page of Designer Series Paper and then for the second page, I chose Soft Succulent 12×12 cardstock. Next came two Pale Papaya DSP for both pages, cut at 11×10 and placed on the inside edge of both bases, centering them vertically. But before that, I noticed my initial sketch showed some type of border on my Pale Papaya DSP on the left-hand page. I had some retired Mint Macaron ribbon and it had a scalloped edge to it. I placed it underneath my DSP to create that border.
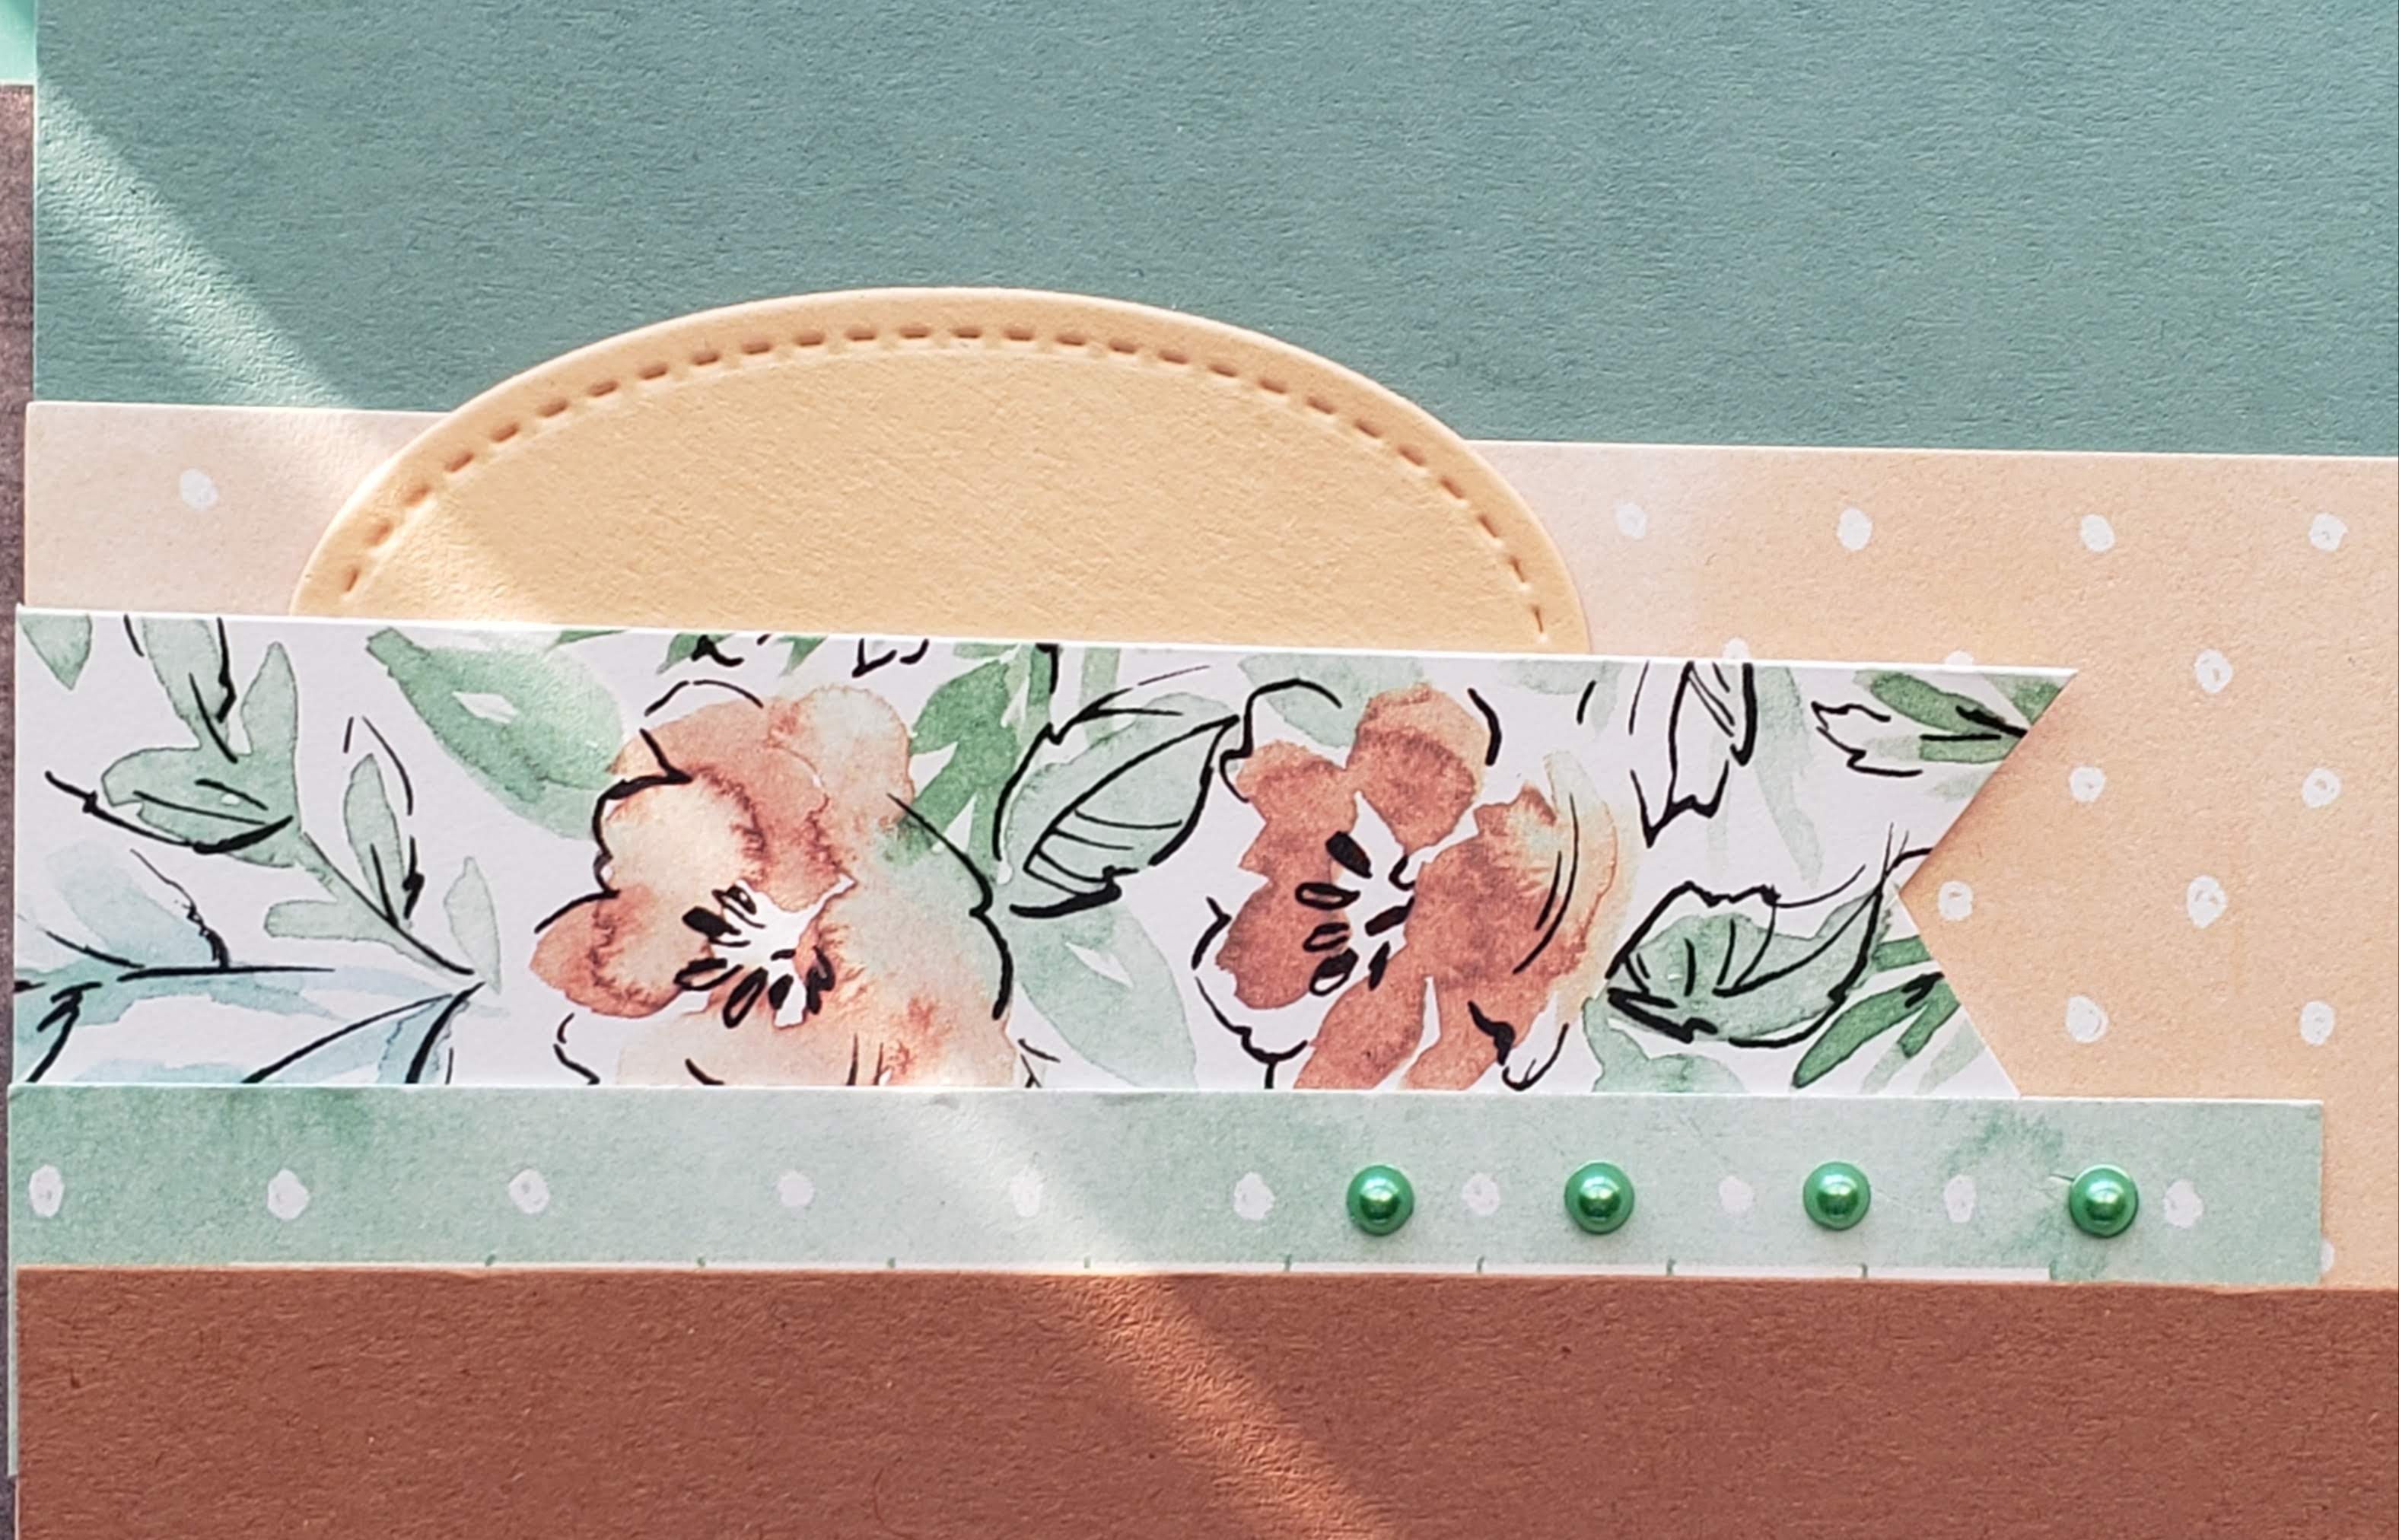
Next came Cinnamon Cider cardstock cut at 9.5×7.75 and placed a little closer to the bottom of the Pale Papaya DSP. I needed to add a corresponding border of ribbon to this cardstock. The final flowered DSP piece was cut to 5×12 and placed accordingly.
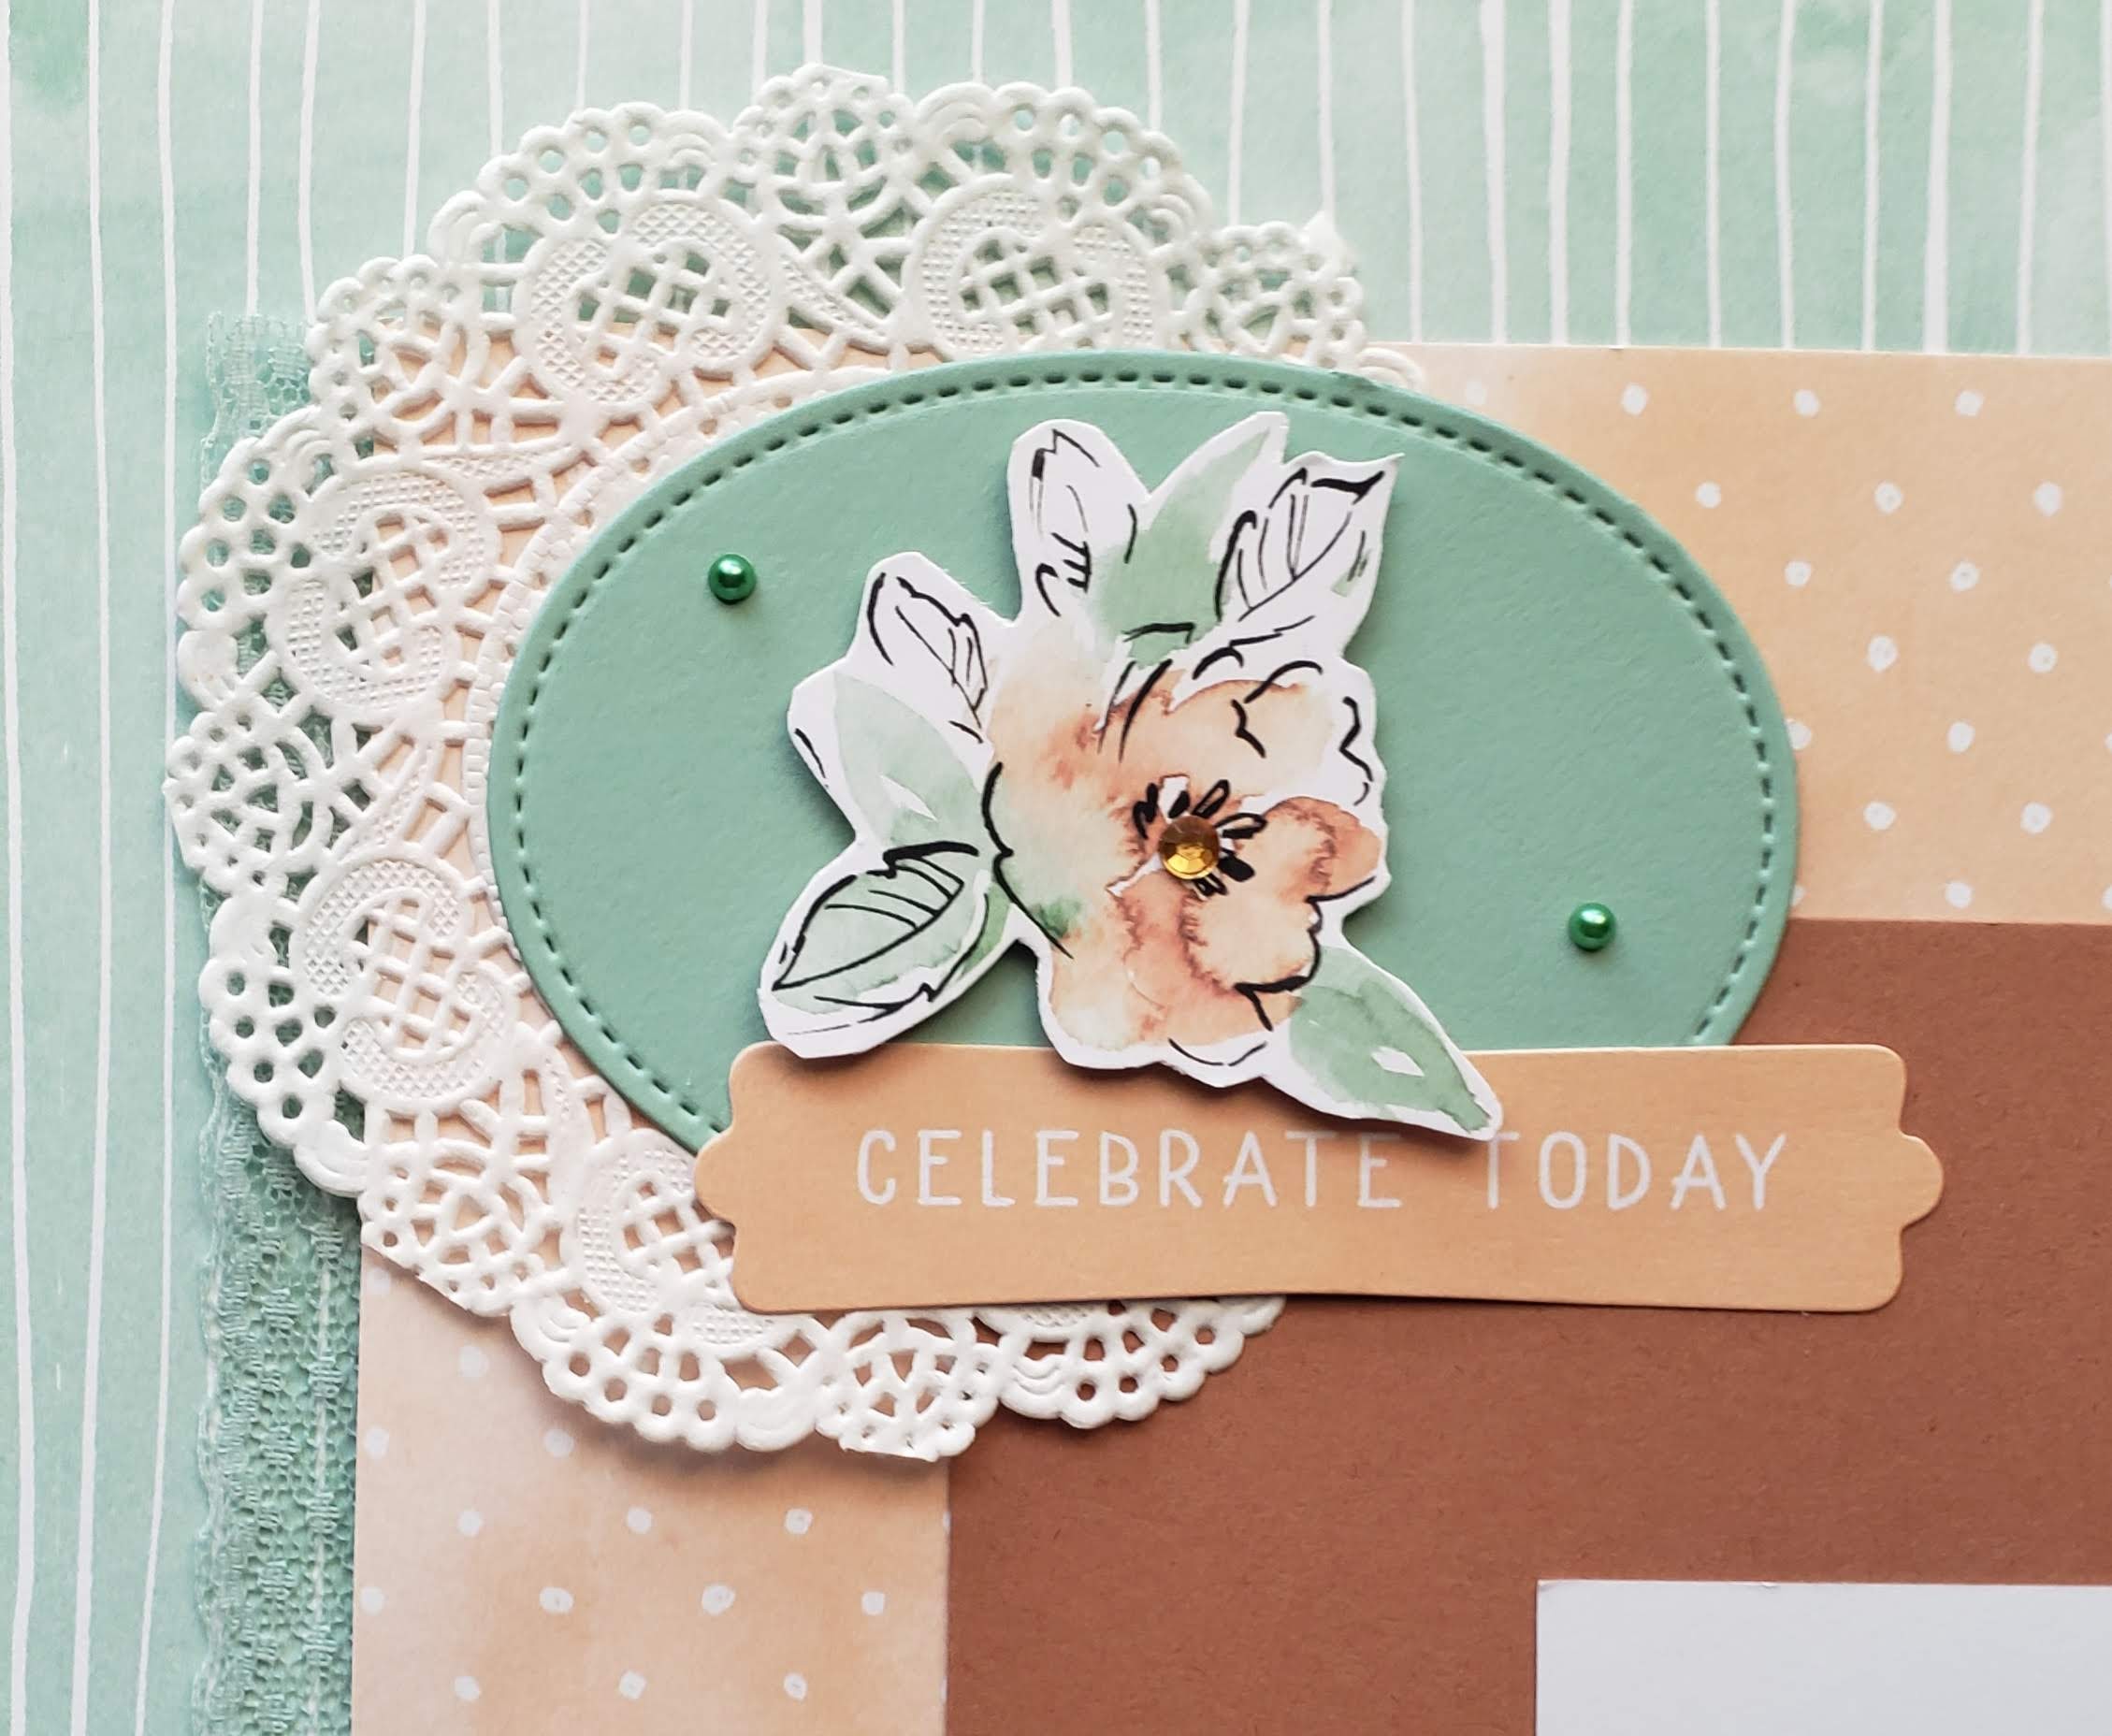
All of the basic layout and adhering of paper and borders took no time at all. The horror that was to come is me trying to create embellishments. I just can’t see them in my head. I tried channeling my “inner sis-in-law” and all that accomplished was my layout looking like I threw up embellishments all over it. So after taking half of the stuff off that I had thrown down, I went back to my KISS (keep it simple, stupid) mindset. A few doilies, a few stitched ovals cut from my dies, a Memories & More card I fussy cut the flower out of, a sticker from the same card pack, and then last but not least a little bit of bling to finish it off. You can also see the ribbon border I talked about earlier.
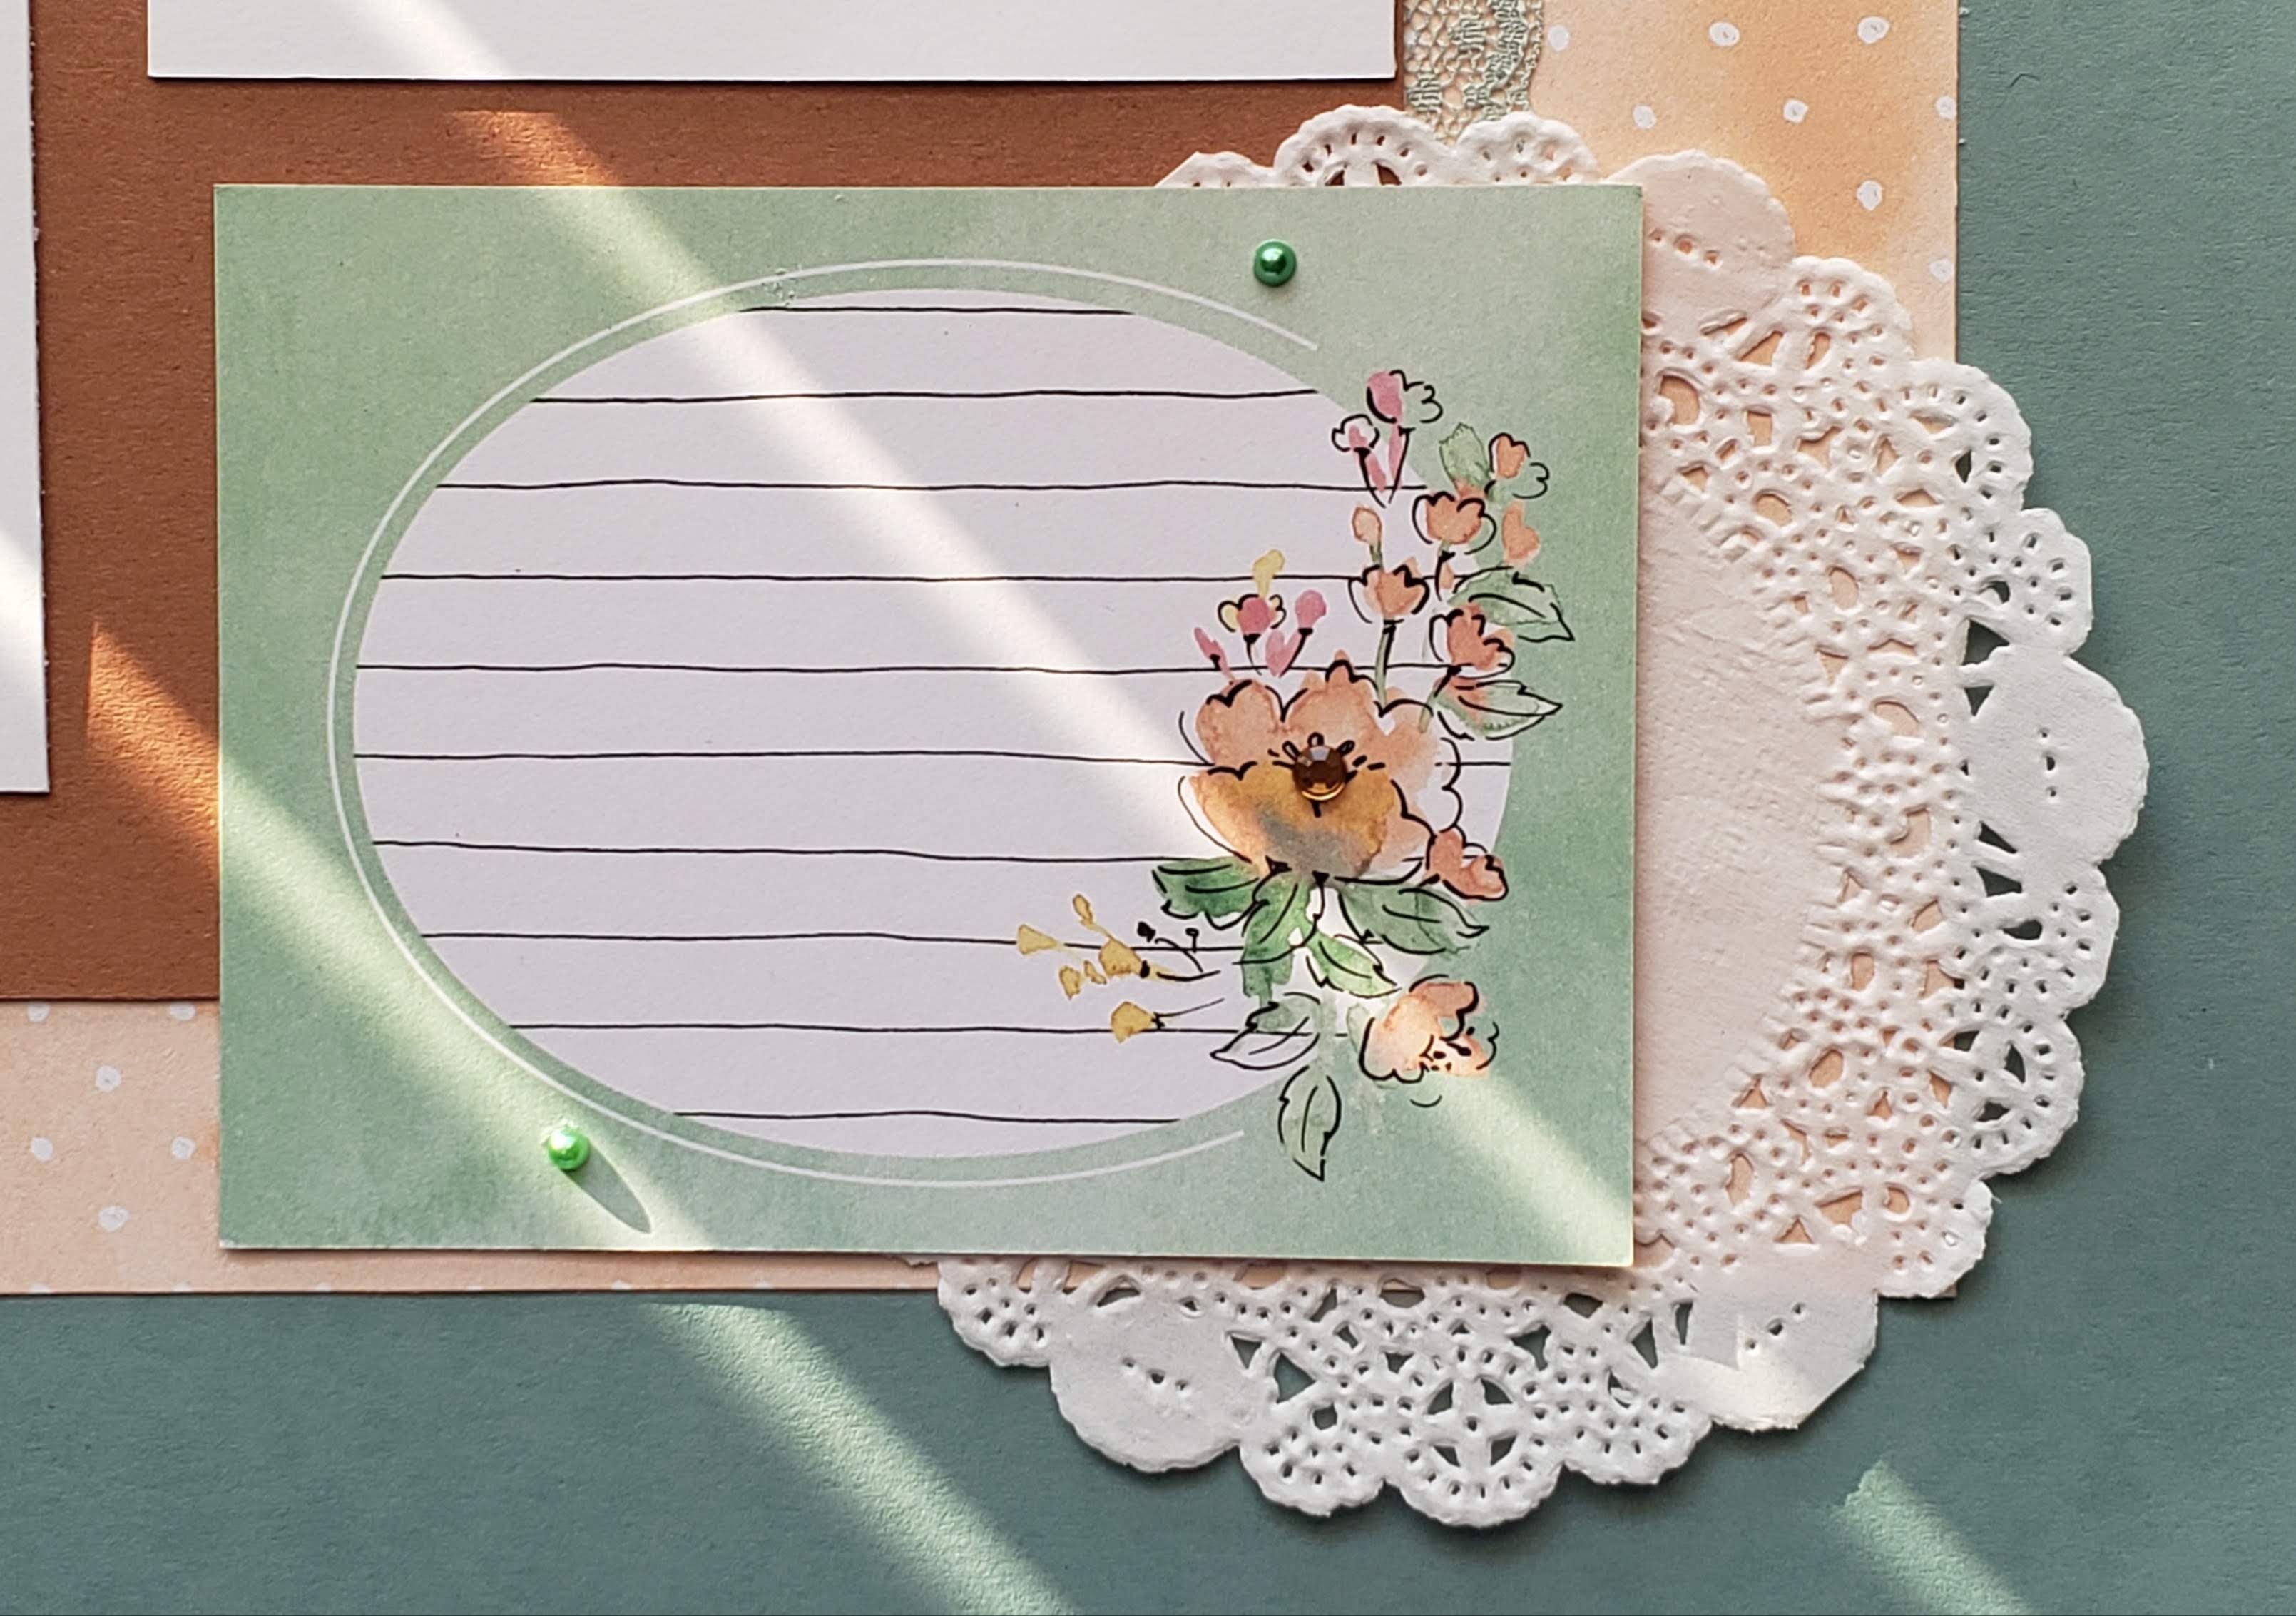
The sketch also had some details at the top of this right-hand page. I used a scrap piece of the flowered paper and again cut a piece off of one of the cards in the card pack and added my stitched oval and some bling. It could probably use a little something else, but I’m at a loss.
And, finally, the bottom right-hand corner. I used another doily and the Memories & More card and a little bit of bling and it is ready for some journaling.
Woooo! One done and three more to go. Keep scrappin’ and stampin’ and don’t forget to check out My YouTube channel and my sis’s-in-law channel. You’ll definitely see why I just copy her layouts!